

Talo Guide
Conversations and assistants
What an assistant is, how to choose and change it, and how to start or continue a conversation in Talo.
When you write in Talo, you are not talking to Talo: you are talking to an assistant. Talo is the workspace that organizes your projects, keeps the history, and shows what the assistant is creating; the assistant is the one who reads your message and does the work inside the conversation, relying on Claude Code or Codex.
Talo is not the assistant, it is the space where it works
Think of it this way: Talo is the office and filing cabinet. The assistant is the person you talk to inside that office, and can rely on two different engines, Claude Code or Codex, depending on which you choose. Switching engines does not change the project, history, or files: it only changes who processes your message.
Talo's assistants
Talo comes with seven assistants of its own, each designed for a type of task:
- Talo Assistant: the general-purpose one, knows the project from beginning to end.
- Data Analyst: for questions about numbers and metrics.
- Report Writer: for writing summaries and documents.
- Quality Reviewer: for checking text before sending it.
- Meeting Minutes and Follow-up: for turning meeting notes into minutes.
- Research and Benchmarking: for finding references and comparisons.
- Project Plan: for planning tasks and deadlines.
All work by default with Claude Code, and you can switch the engine to Codex for any of them. You can also choose the basic assistant from Claude Code or Codex, without Talo's rules; in that case it does not receive the project card or TALO.md. You can see the full catalog in "Assistants and skills", in the sidebar.
Claude Code and Codex are engines, while Analyst, Writer, and the other names are specialties that use one of those engines. In "Assistants", the active tab separates "CLI Engines", "Talo Specialists", and the custom assistants you have created. It shows the engine and whether it is ready, not checked, not installed, or not available. "Use in chat" opens a new conversation with the chosen assistant; you can also choose it from Home before sending the first message. The choice is fixed for that conversation: writing @Analyst in an already-open chat does not create another agent or delegate a task to it. To start with another specialty, open a new chat and choose the same project.
Each assistant offers example prompts to get started, and in the text box you have quick commands like /summarize, /review, or /write that expand to an already-written instruction.
Start a new conversation
- Go to Home, or press ⌘N from any conversation.
- In the composer, choose a project (or "No project" if it is something loose that doesn't belong to any client).
- Choose the assistant; if you don't touch anything, it starts with "Talo Assistant" on Claude Code.
- If needed, change the engine to Codex from the same composer.
- Type your message and send it.
If you choose "No project", the conversation is saved in a temporary folder, not inside any project. Home also offers some ideas to get started: clicking one just fills the composer, it does not send anything for you.
Continue a conversation
Label conversations
In the sidebar, open the menu of a conversation and choose "Conversation labels". Type the labels separated by commas and save. You can use up to 12 different labels of 40 characters. The first one appears next to the title, and if there are more, you will see how many are left; hovering shows the full list. Labels do not change the conversation's content or its project. Filtering by label is for a next iteration.
Move a conversation to another project
If you started a conversation "No project", or opened it in the wrong project, you can move it without losing any of what was discussed. There are three ways to do it, all lead to the same place:
- In the conversation's menu (sidebar or inside a project), choose "Move to project…".
- In the header of the open conversation, click "⋯" and choose "Move to project…".
- Drag the conversation from the sidebar and drop it over a project or sub-project.
In the first two cases, a selector lets you choose the destination: any of your projects, their sub-projects (with the path "Project › Sub-project" so you don't mix them up), or "No project". Drag and drop already carries the chosen destination; in all three cases you see the same confirmation screen before moving anything, which clearly explains what changes:
- Memory: the messages in this conversation will count toward the destination project's memory and will stop counting toward the source project's memory.
- Files: the files the assistant already created stay where they are, in the source project's folder; Talo never copies them between project folders automatically.
- Assistant session: the assistant continues the conversation from the new project's folder. When the old session cannot continue there, it starts a new one with a summary of what was discussed before the move, and you will see it noted in the chat itself.
Moving between two different top-level projects
If source and destination are two different top-level projects (for example, from two different clients), the confirmation adds an extra warning and asks you to check a box: "I understand this conversation contains information from \<source>". You cannot confirm the move without checking it. Moving between a project and one of its own sub-projects does not count as this case.
Only you can move a conversation: no assistant or automation can do it on its own. Talo also rejects the move while the conversation has a turn in progress, or while there is a specialist working on it (@Specialist/"Get help"); in both cases it tells you with a clear message so you can try again when it finishes.
Home has a block "Continue where you left off" with the last thing you worked on in any project: conversations, but also documents and whiteboards you had open. Inside a project, you also see its own conversation history in the sidebar.
Mode: Autonomous or Ask before acting
In the text bar, the "Mode" selector shows how the assistant asks for permission in that conversation:
- Autonomous (recommended), the value for new conversations: reads, searches, edits inside the project, and runs commands without asking you at each step. Writing outside the project or to a cloud folder is rejected without a card and the chat explains why.
- Ask before acting: it asks your permission before editing files or running commands.
Hovering over the selector shows what still asks for your confirmation even if you are in Autonomous (publishing to the cloud, MCP tools, installations, memory, Jira/Linear/Trello, specialists, and automations). The change applies from your next message; if the assistant is answering, wait for it to finish. The mode new conversations start with is chosen in Settings › Agents and Models. More detail in Privacy and security.
While the assistant answers, text appears little by little; if the answer is very long, you can click "Stop" at any time and keep writing. If you close Talo completely and open it again, the conversation and all its history are still exactly where you left them.
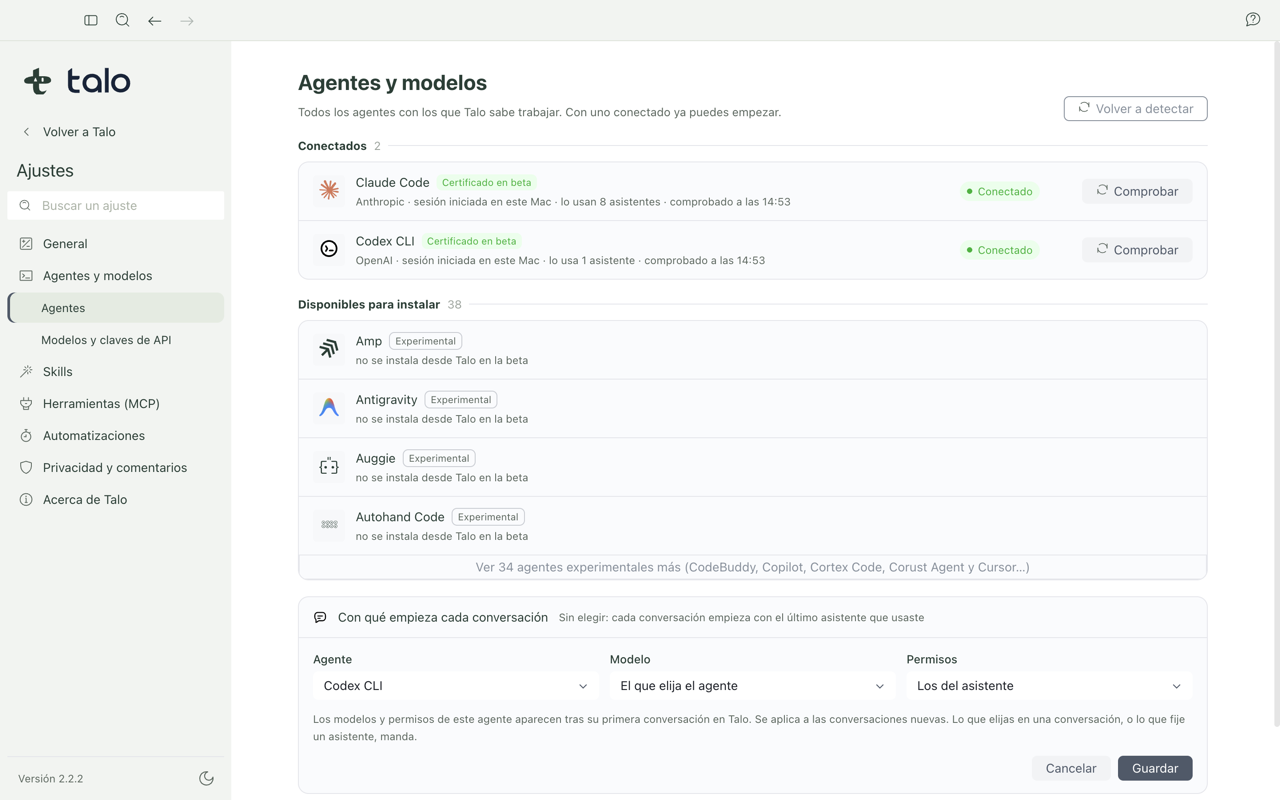
What each new conversation starts with
Review the permissions for each flow
Installing a new skill or tool requires a decision from the person. The actions of the built-in browser have their own controls. An automation already active can run on schedule or trigger without a question each time, but leaves its changes pending for you to review before applying them. See Privacy and security.
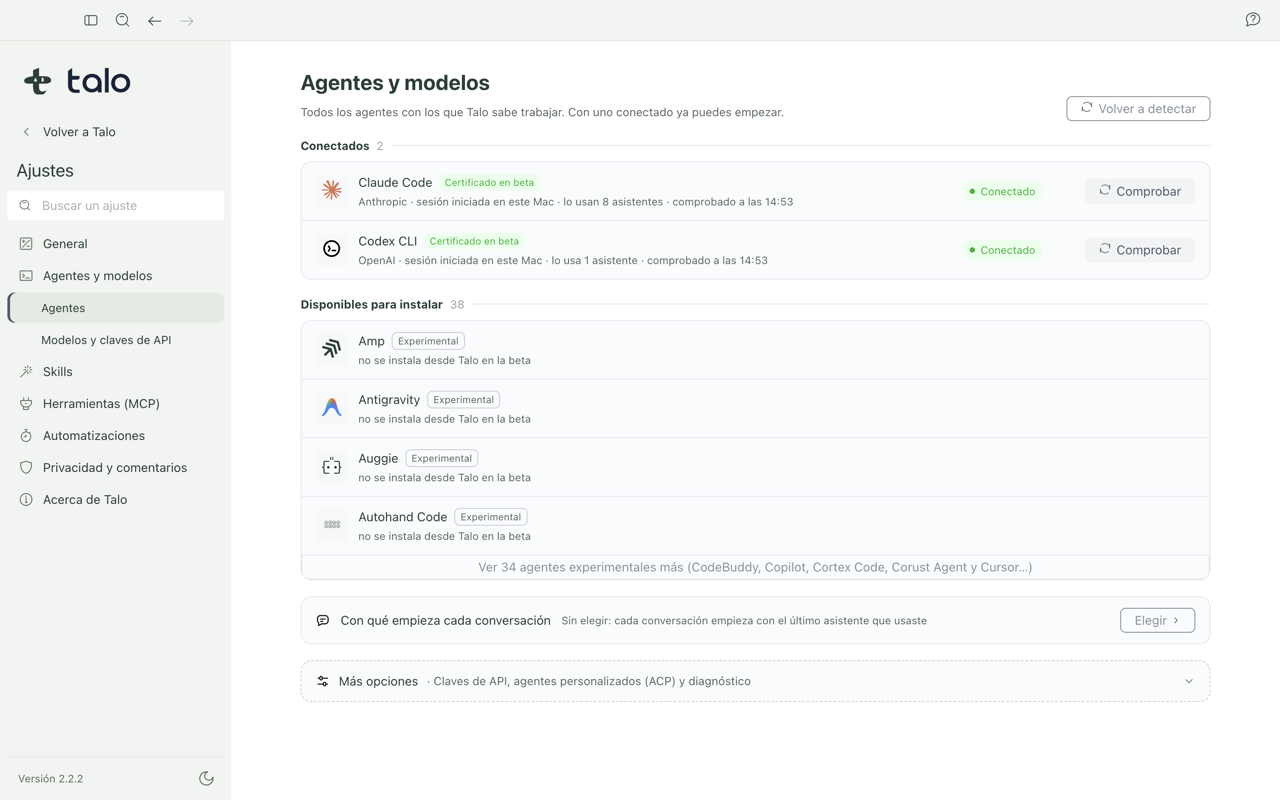
Besides choosing it each time, you can set beforehand the assistant, model, and permissions with which every new conversation starts, so you don't have to repeat it. That is configured in Settings › Agents and Models; the rest of Settings is explained in Settings. On that same page, "Mode for new conversations" chooses between Autonomous (the default) and Ask before acting for conversations with Claude Code or Codex.
What an assistant can produce
Inside a conversation, an assistant can create and edit documents, diagrams, and whiteboards (see Documents, diagrams and whiteboard) and use tools connected through MCP to expand what it can do (see MCP tools).